The Winlink system is great for getting messages moved around, but its not necessarily pretty. To make it easier on the eyes of the user and served agencies, forms were implemented. These present a more friendly way to send messages back and forth. Check out this example of how to use forms.
Forms have been implemented inside of Winlink Express for a while now. They rely on pre-downloaded form templates that open inside a browser window for editing or review. Since each end has the pretty formatting already downloaded, all that needs to be transmitted is the text of the messages and a small XML file.
If you have a more recent version of Winlink Express installed, the forms should already be installed and they are automatically updated when new versions are released. So to ensure you have the latest and greatest, head over to the
Winlink.org site and download the newest version of the software.
 |
| New Message Button |
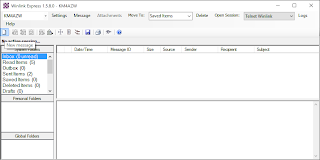
To use forms, you click on the new message button like you normally would.
 |
| Select Template |
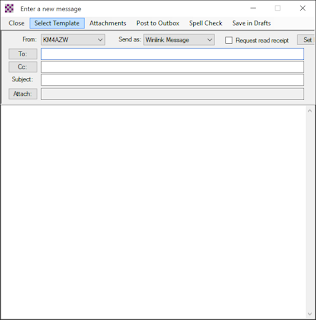
At the top of the new message window, you will notice a button called "Select Template."
 |
| Template Manager Window |
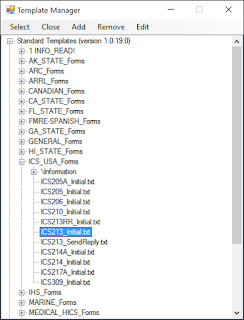
Clicking this button will display a tree list of all the templates and forms you have to choose from. In my example I'm choosing the ICS213_Initial.txt form under the Standard Templates.
 |
| Form In Browser Window |
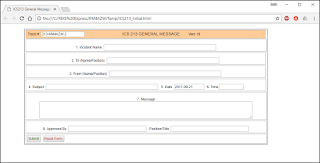
After you select the template, a browser window should open up with a well formatted form that you can fill out.
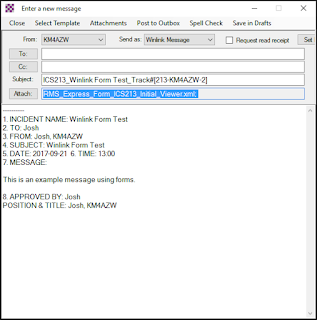 |
| Filled Message Window |
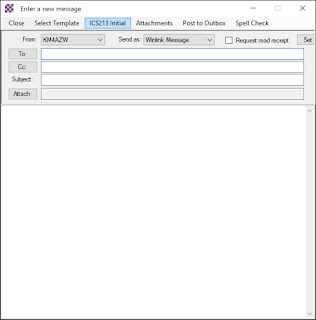
Once you fill in the necessary fields and click submit, you can return to the new message window inside Winlink Express and see the basic information you wrote into the form in the main message window.
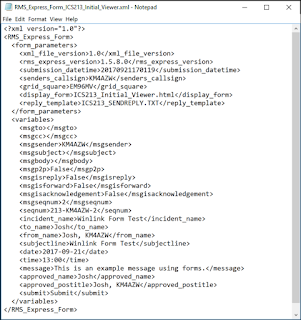 |
| XML File |
You will also notice an .xml file is also attached to the message. This is the file that actually gets loaded into the form when the message is opened by the recipient. I assume the plain text "meat" of the message is sent alongside the XML file just in case the recipient is using a client that doesn't support these new forms.
Before posting the message to the outbox, you will need to remember to fill in the "to:" field with the callsign or email address of the recipient.
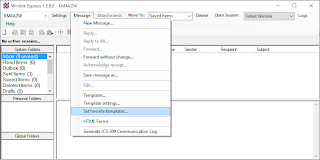 |
| Set Favorite Templates |
If you find yourself using the same forms over and over again, you can add a shortcut at the top of your new message window so you no longer need to navigate through the template manager. You can change this by clicking "Set favorite templates" under the message button.
 |
| Select Favorite Template |
This opens a window where you can select up to four templates as favorites and add a single click button at the top of the message window for each. Just click browse and choose the template you want.
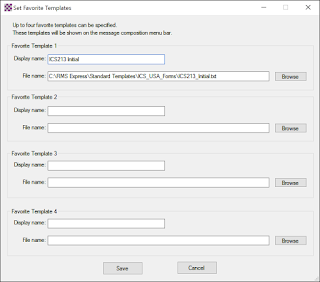 |
| Create a Friendly Name |
Then add a friendly name as the Display name and click Save.
 |
| Favorite Template Button |
You will notice, now you have a button at the top of your new message window with the name you chose. With a single click of this button, the form you selected as a favorite opens for editing.
As you can see, form templates are a more visually appealing way of conveying Winlink messages which makes sending and reading messages much easier.


No comments:
Post a Comment